
Domain Transfers
This is the process of moving domains from one
Registrar to another.
Domains require annual renewals through their Registrars. We can provide Domain Hosting for our clients without additional cost. This is included in our monthly hosting fee weather the client avails this service or not. So, whenever it is "safe" to offer, you can ask the client if they would like us to host their domain & initiate a domain transfer. This way, the client can save a few bucks & wouldn't have to worry about renewals since we will take care of that for them.
Step 1
Pre-Transfer Checks
Before Initiating a Domain Transfer we need to do the following.
A. Does the Domain have a Business Email?
Investigate if there's an email using the domain you're trying to transfer.
- If there is none, proceed as normal.
- If there is an existing email, identify what the Email Provider is.
- If the email provider is
Different from the Registrar, take note of the MX & TXT records for now. You will need to re-add them to the DNS records in Dynadot once the Transfer is complete.
- If the email provider is the
Same as the Registrar, this is the scenario that we are looking out for. Do not proceed with transferring unless the client insists. It is discouraged to even pro-actively offer Domain Hosting at this point since transferring will lead to potential problems with the Business Email & clients mostly do not want any interruption in their email service.
If your client requests & insists for us to Host their Domain, advise that you will need to recreate their business email in our servers if they plan to stop paying the old Registrar's service, which would cause the email to stop working. We can keep the exact same email addresses but this will cause the Inbox to be "wiped out". So if they have any emails they wish to keep, they'll need to download, or forward those to another email address to save them.
Optional Info
The Inbox doesn't really get wiped out, but simply remains in their former email provider's server, their old inbox. Switching to a new email provider will have a new & empty inbox in the new server. We can only have 1 email provider per domain you see. We simply advise that their inbox will be "wiped out" during the transfer for easy understanding for our clients that's not tech savy. Many of our clients are business owners & are in the age group that didn't grow up with tech.
B. Is Domain Pointing done?
If Domain Pointing hasn't been done yet & you have Registrar access, complete the Domain Pointing Process first before you initiate the transfer.
This way, we can bring the website live on the legacy domain instead keeping the client waiting 7 days for the transfer to complete first before bringing the new website live on their original domain. To learn how to Domain Point, click
HERE.
Once you're clear with your Pre-Transfer checks, you may proceed with initiating the transfer.
Step 2
Initiating the Transfer
You will need the "Transfer Code" to begin this process. You can obtain it in 2 ways:
- Log into the client's Registrar Account to generate the Transfer Code.
- Have the client, provide it to you. If the Registrar is a corporate account that belongs to your client's legacy web builder, they will not provide login access to you as their Registrar will hold all the other domains that they host for our clients. Just like we do with our Dynadot account. The client will need to ask for their legacy web builders to provide it, which can be troublesome if the legacy web builders are not cooperating. Cooperating with us, technically means them loosing their clients to us.
In most cases, the Registrar Account belongs to your client & they will provide the login credentials to you.
Note that you can only generate the transfer code if you're logged in using the client's credentials, and not thru delegated access.
Once you're logged in as the client, follow the below steps to generate a transfer code.
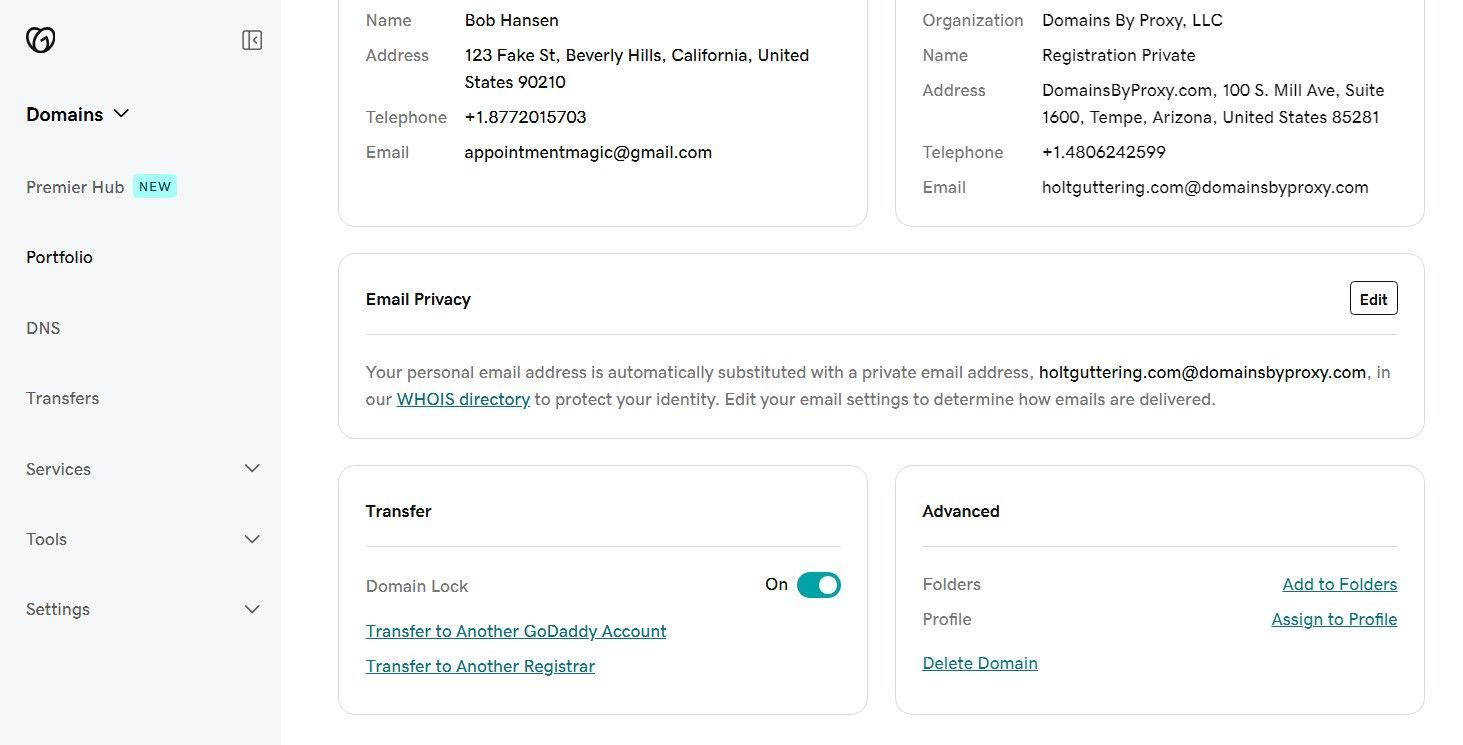
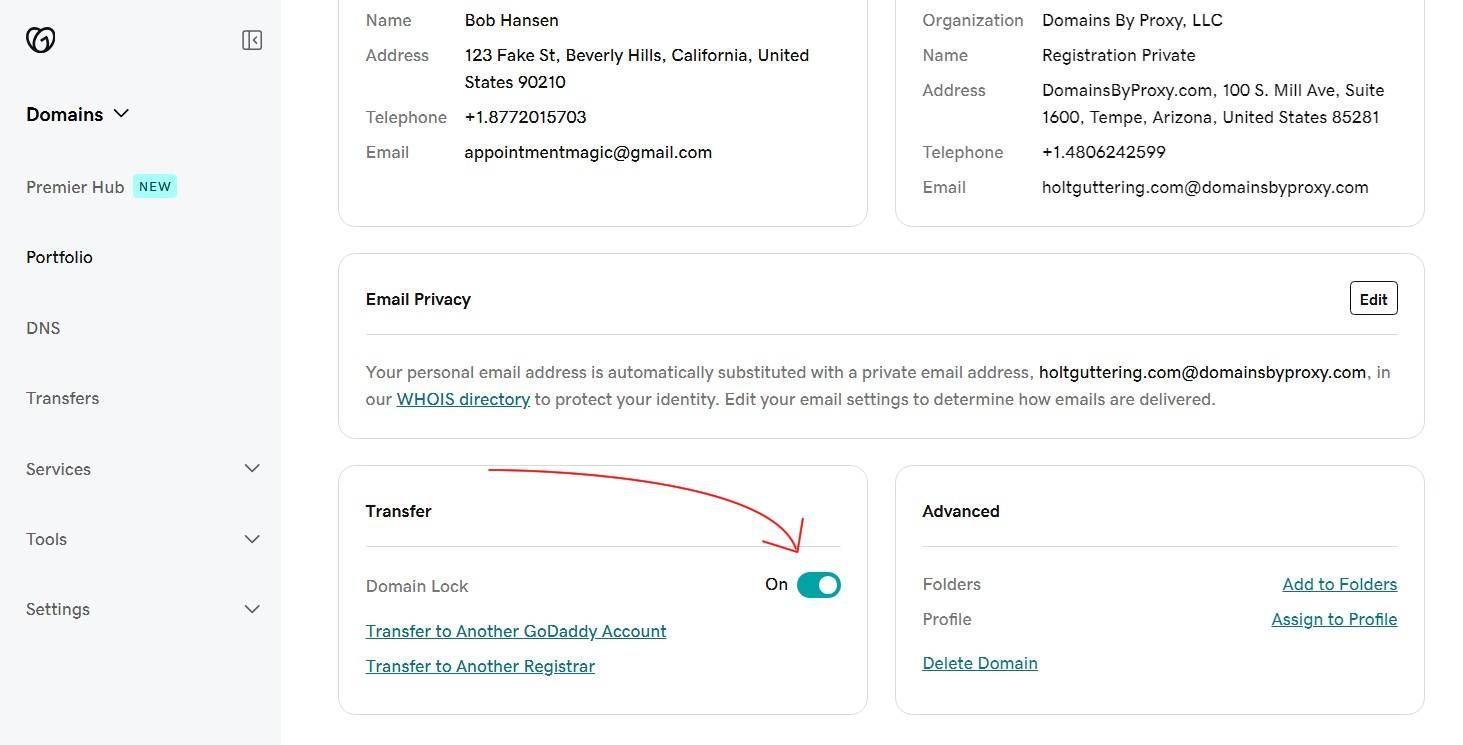
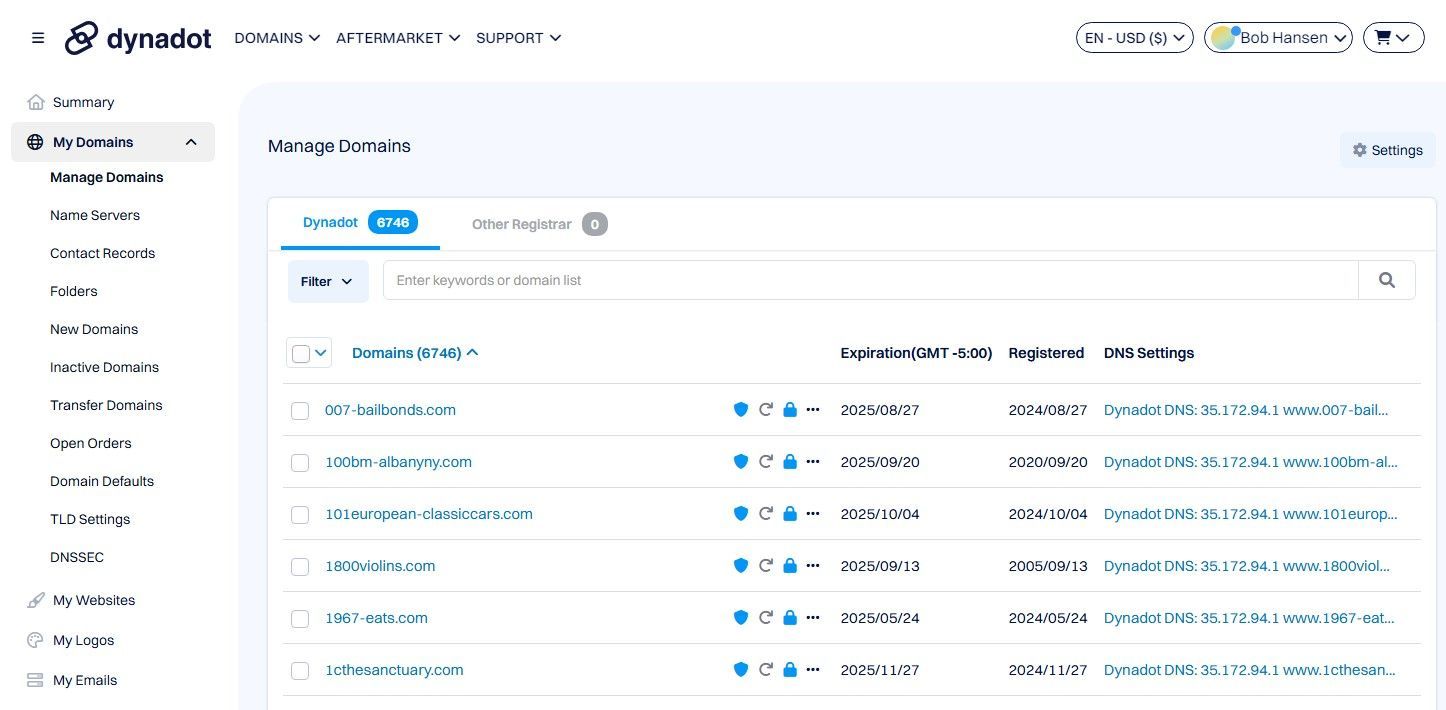
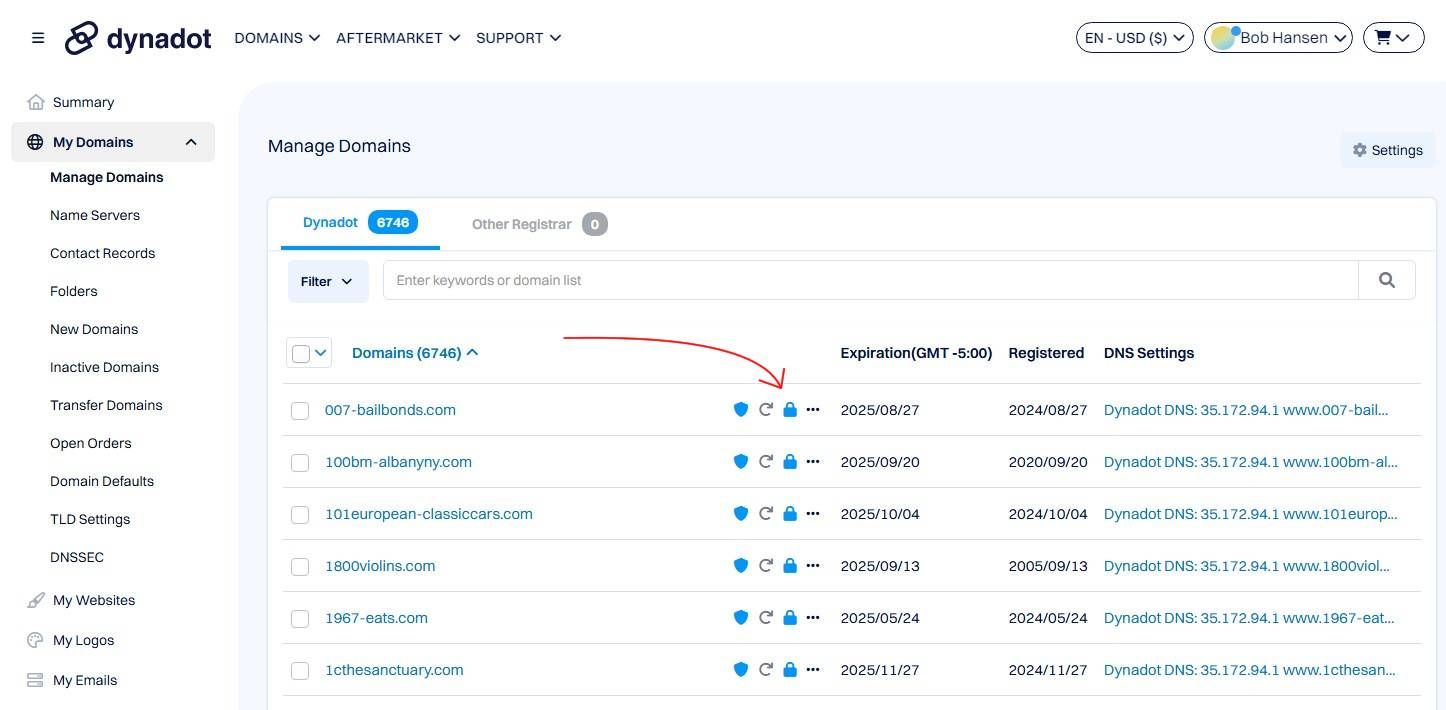
Unlock the Domain
Find the option to unlock the domain. Remember that this will look different between different Registrars, but this option is available for all Registrars.
Example 1
Example 2
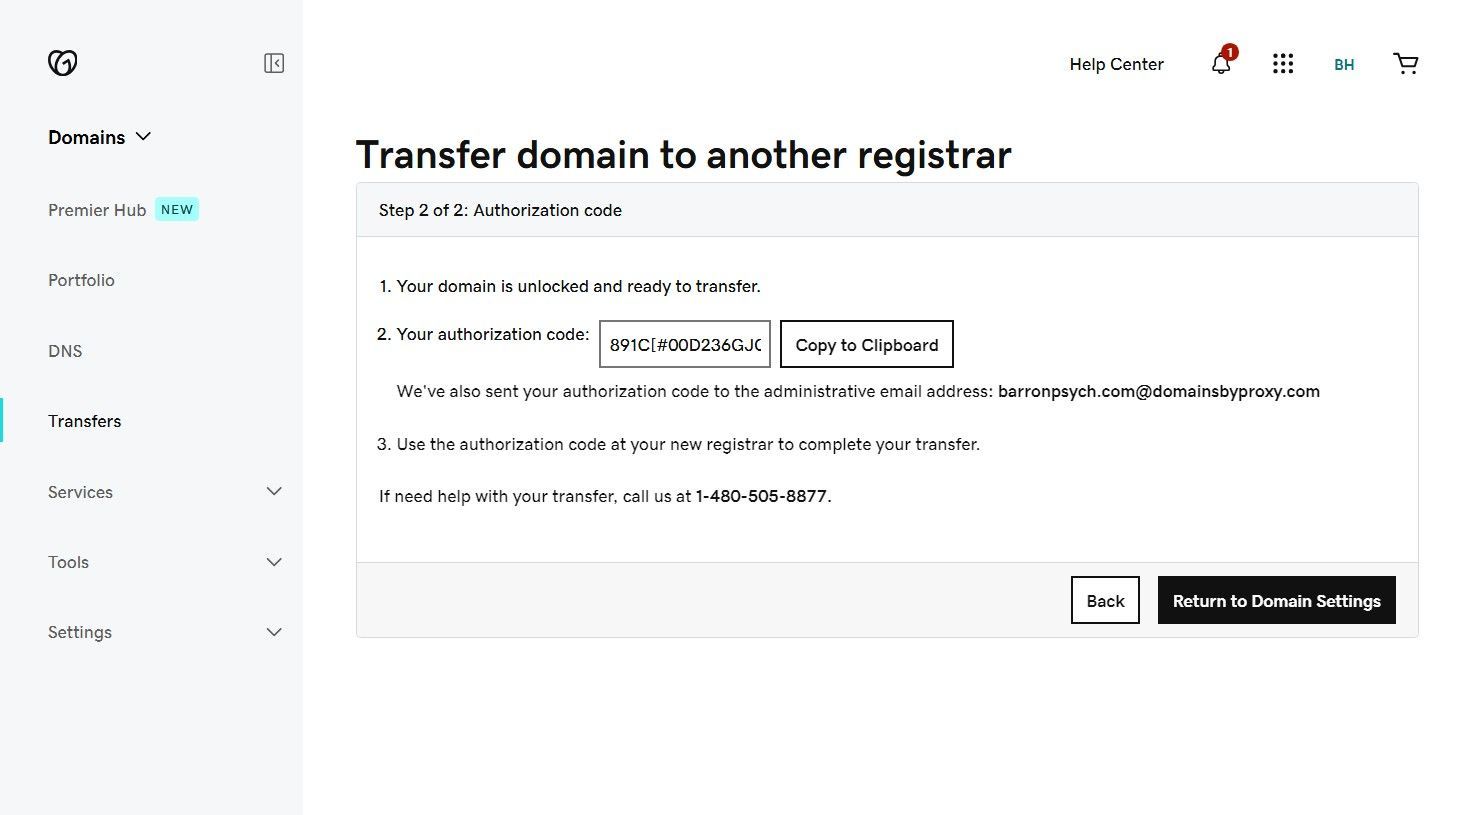
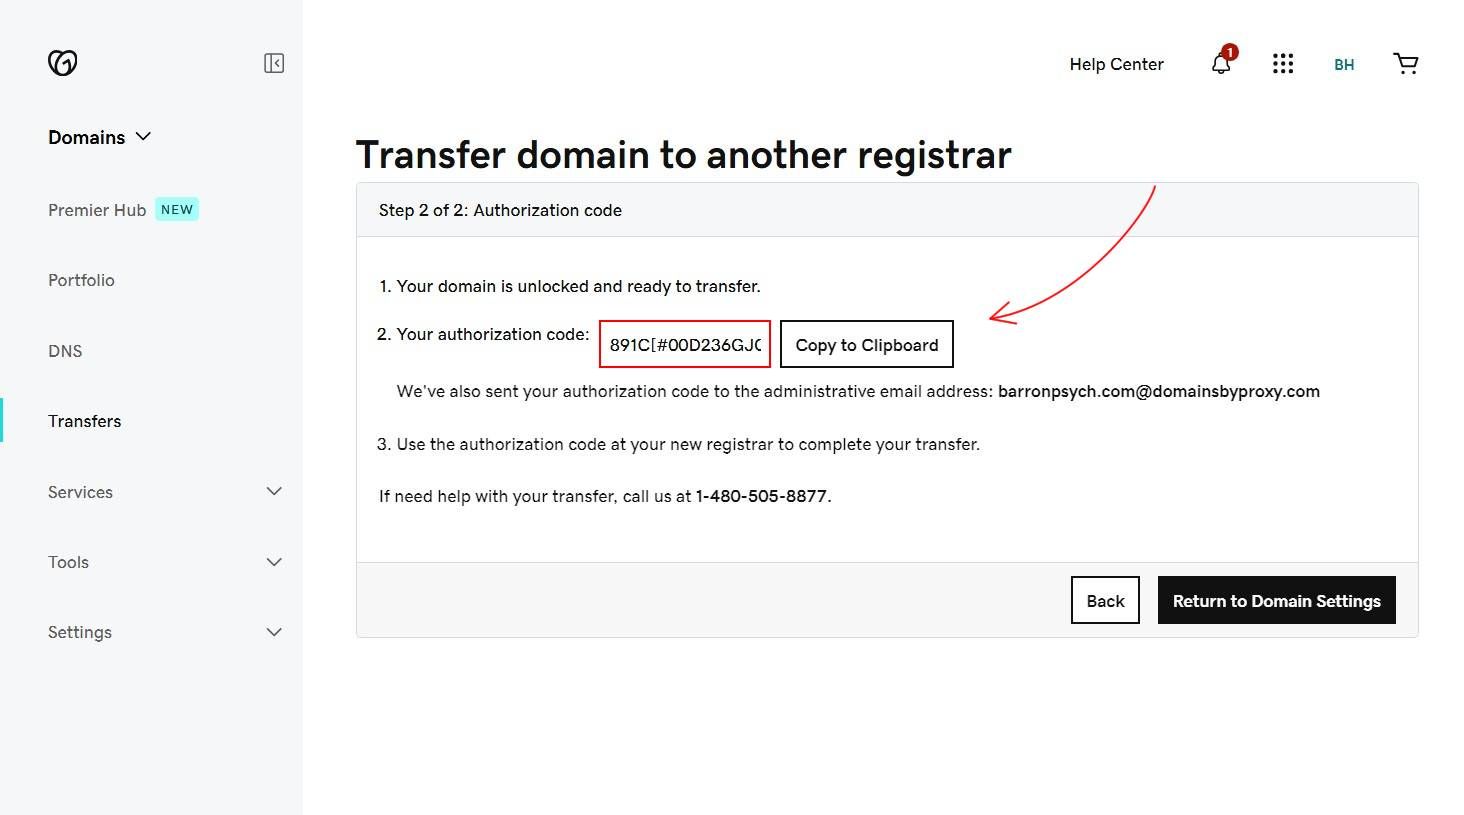
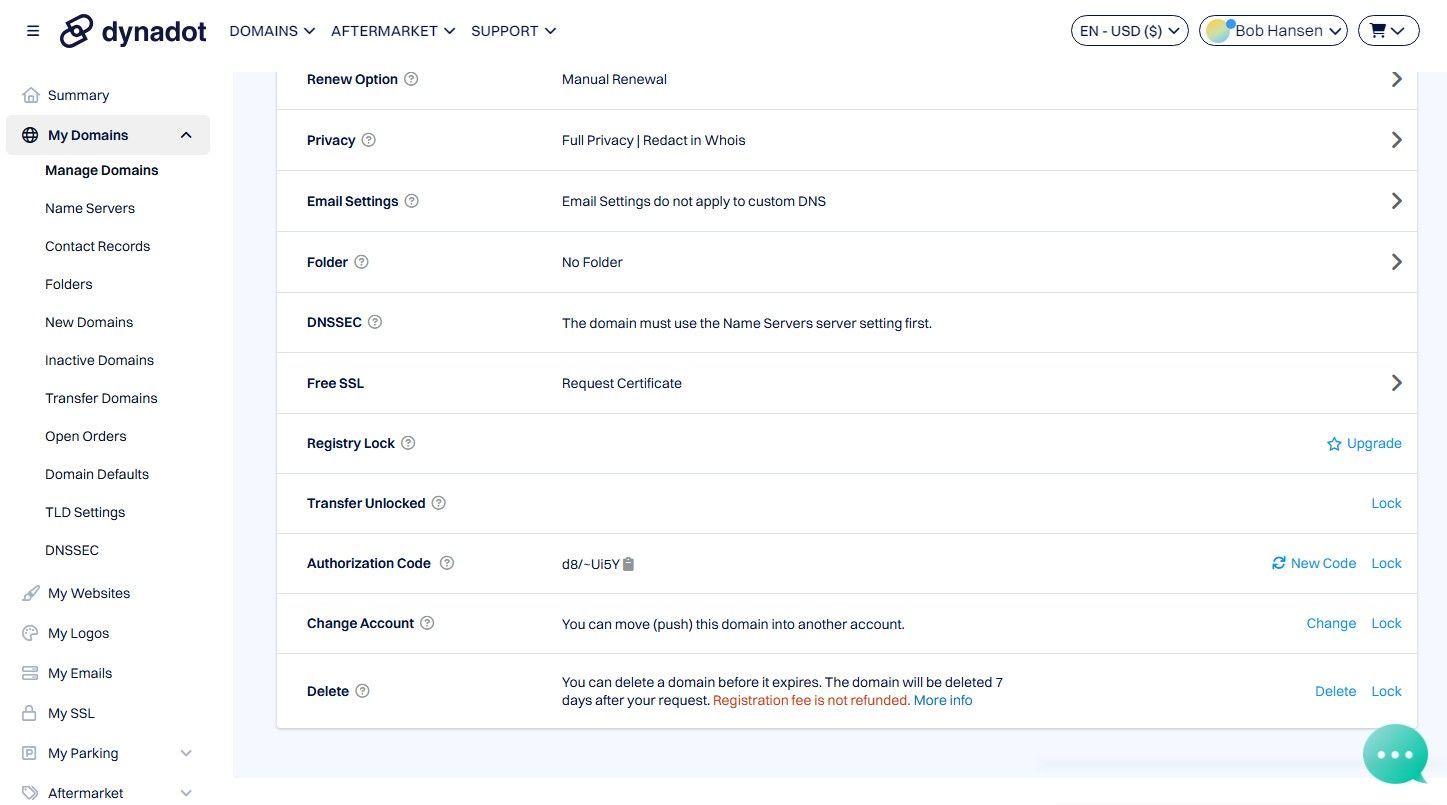
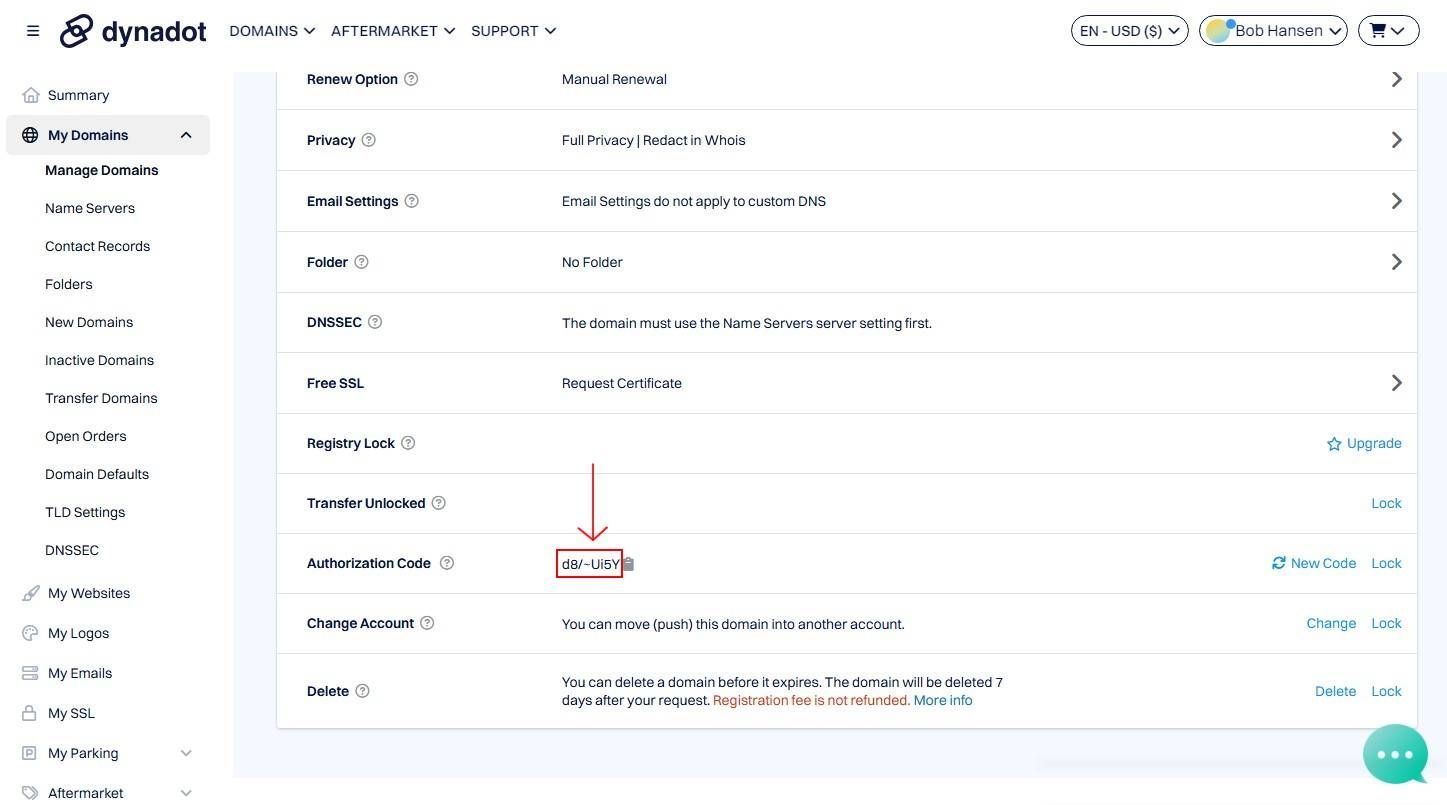
Generate the Transfer Code
Remember that the Transfer Code is also known as the, Authorization Code, Auth Code, or EPP Code. This all refers to the same thing
Example 1
Example 2
Transfer the Domain
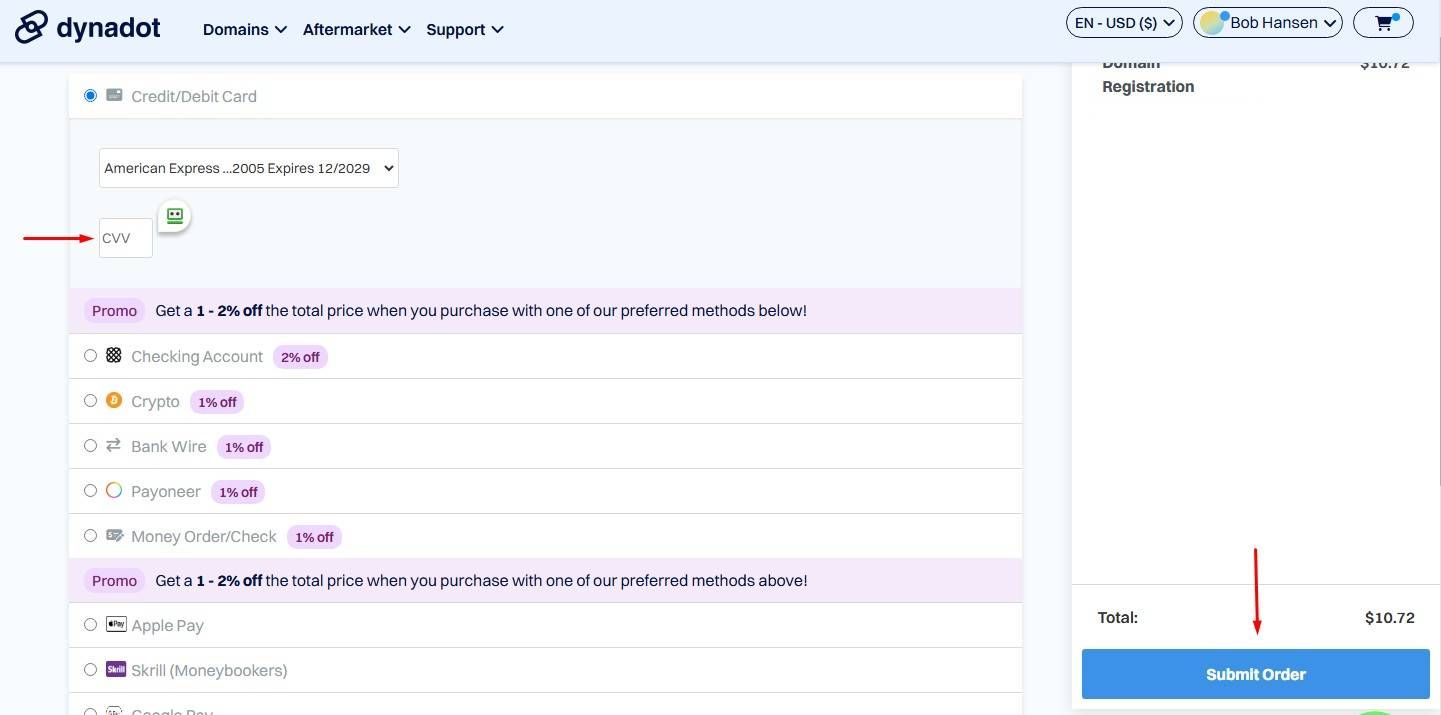
Go to our Dynadot Account and proceed with the Transfer.
Enter the Domain & the Transfer Code

Enter the CVV 9227 & submit
Step 3
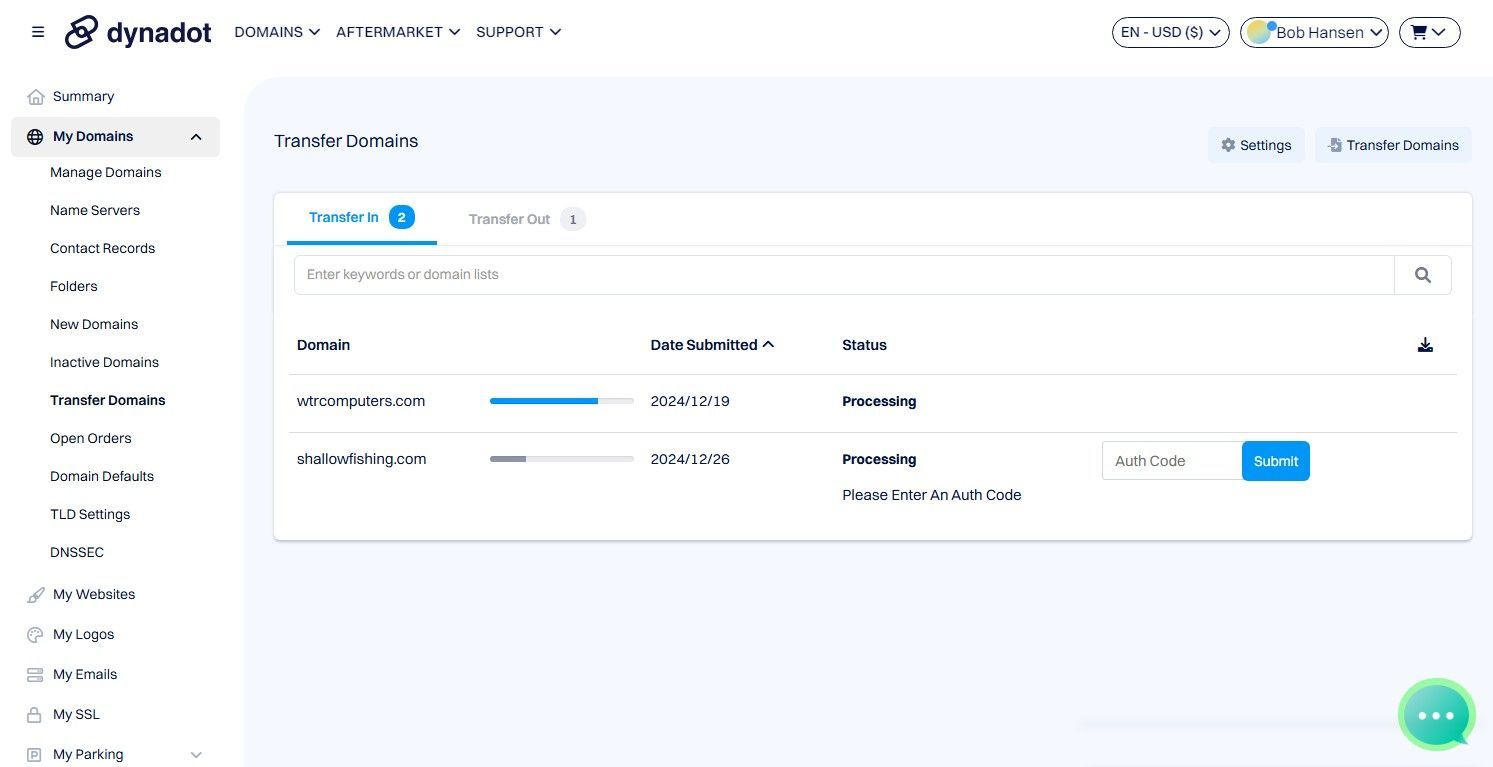
Transfer Monitoring
Transferring Domains normally takes 7 days to complete for most registrars.
GoDaddy & Dynadot has an option to complete the transfer on the same day
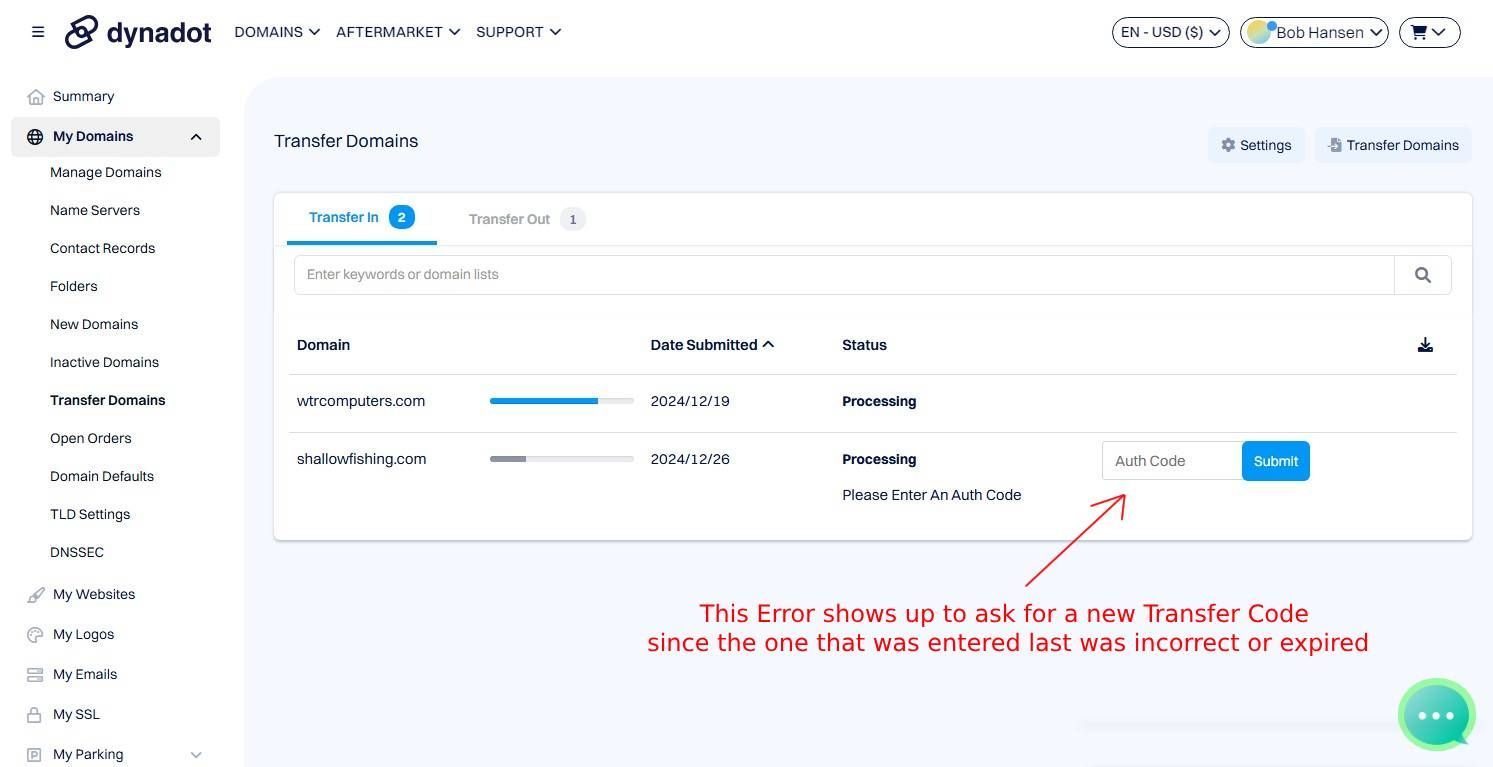
For transfers from all other registrars, you will need to monitor the transfer status in Dynadot on a daily basis to check if the Transfer runs into an error with a wrong Transfer Code or if the transfer is already competed.
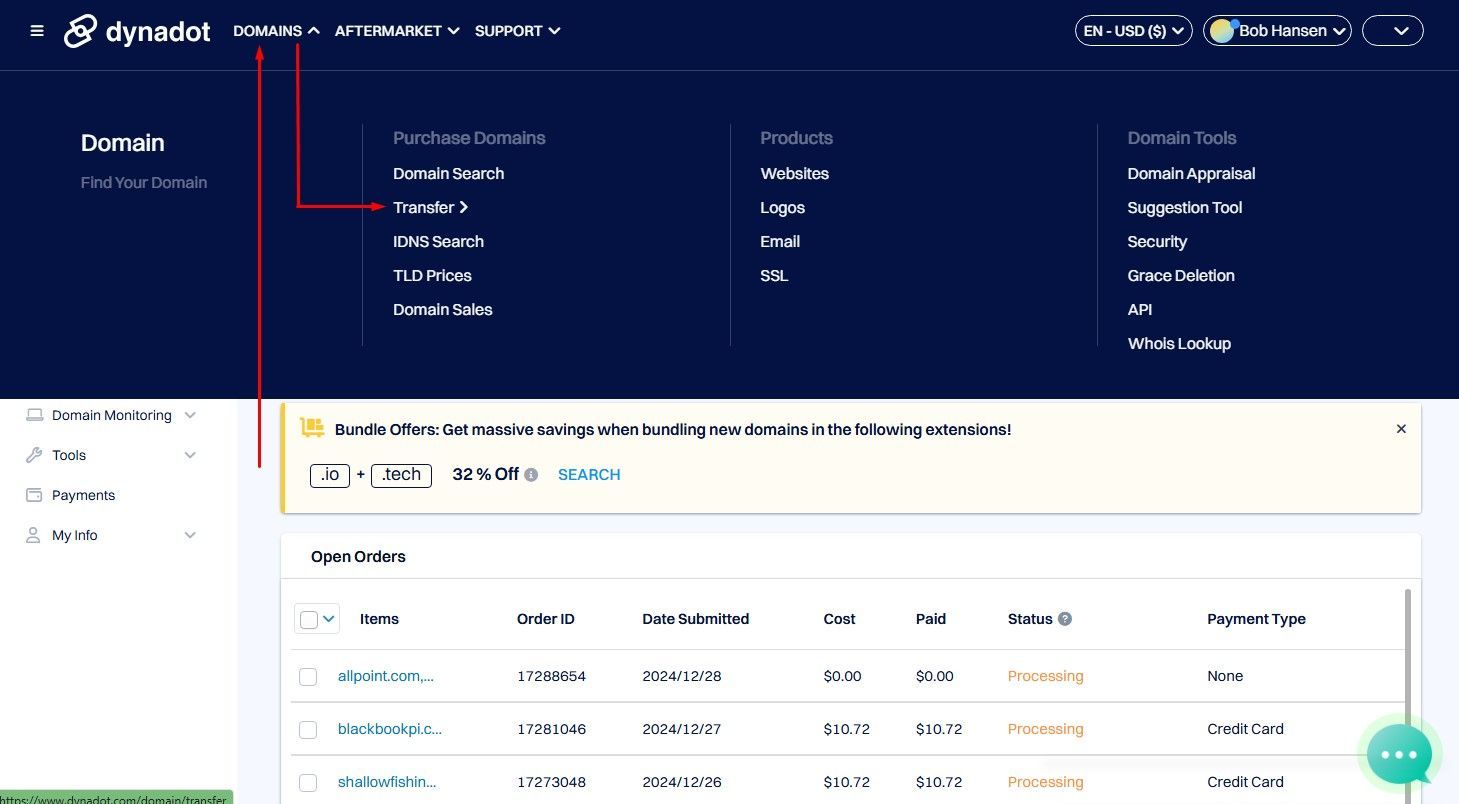
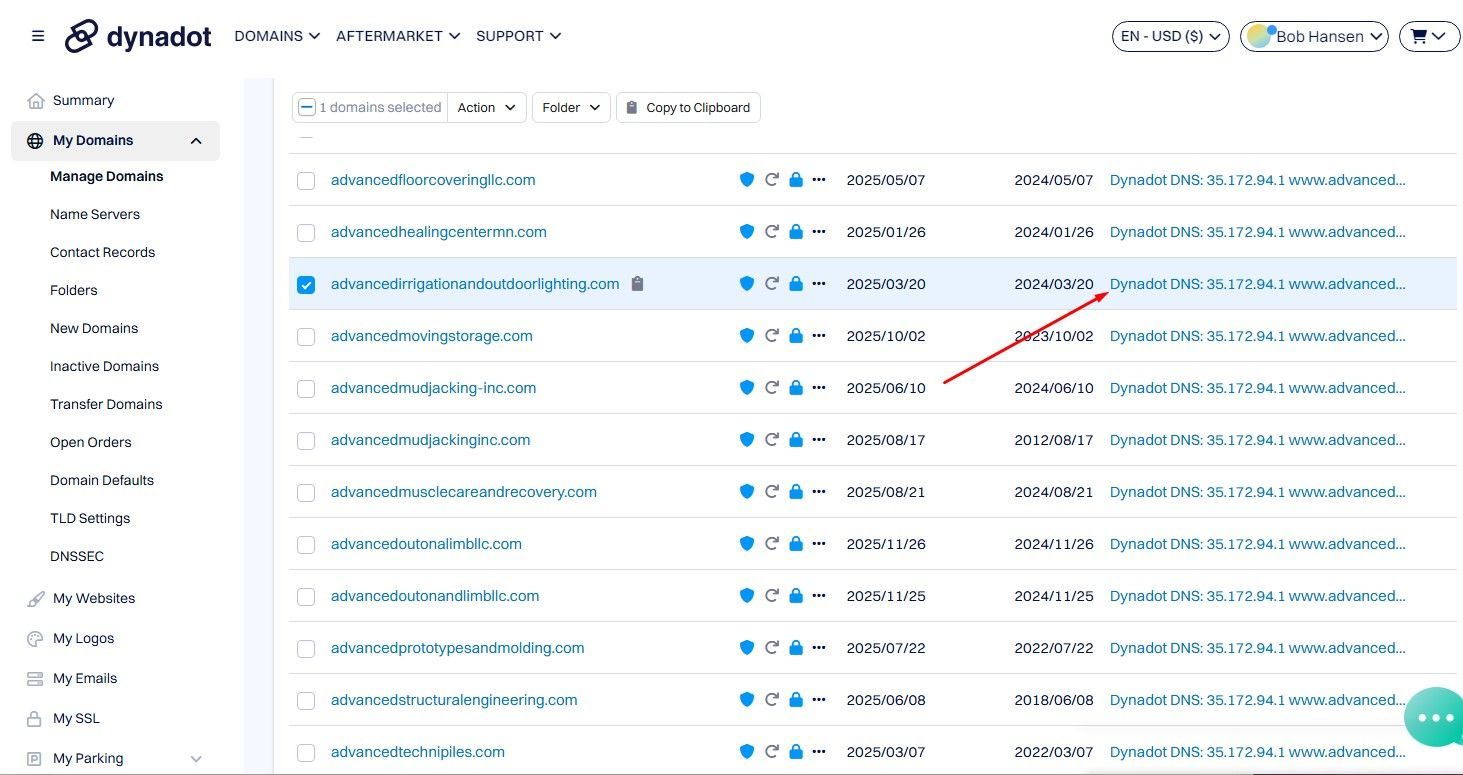
In Dynadot, click "My Domains" > "Transfer Domains"
The domains in processing to be transferred are queued here.
Step 4 Post Transfer
Once the Transfer is Completed, you need to set the DNS Name Server to "Dynadot DNS" & sort the DNS records as needed.
Website DNS: Sort A & CNAME records as per our
Domain Pointing Process.
Business Email: Replace the MX & TXT records with the ones you noted from Step 1.A above.
In the event that your transfer has completed & you do not have the MX & TXT records to reconnect the Business Email, click HERE.

Follow Up Calls must be done every time you finish a call with a client. Until we can automate these.
You can enter more details in the Bitrix Field on what is Pending from the client, & any undone items in the Launch Checklist
Do not forget to update the "Last Call Date" field in Bitrix as well, every time you finish a call with the client.